I found this vintage Easter card at the Ottawa Vintage Clothing Show last November and saved it for this occasion.
Sunday, March 31, 2013
Happy Easter
I found this vintage Easter card at the Ottawa Vintage Clothing Show last November and saved it for this occasion.
Saturday, March 30, 2013
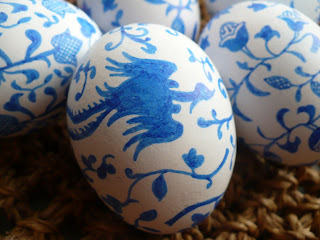
Pysanky
The Ukrainian art of pysanky, with its traditional strong bright colours, creates beautifully decorated eggs for Easter.
Friday, March 29, 2013
Easter Eggs
Sunday, April 8, 2012
Happy Easter!

A perfect pairing: the striking yellow stars of forsythia flowers, and pussy willows.

Some of the pussy willow branches were cut while they still had their furry catkins, the others were left longer to explode into firework-like blooms.

How fortunate that Nature timed it so that they would be ready at the same time for an Easter arrangement.
Saturday, April 7, 2012
Quail Eggs

I found these adorable quail eggs at an Asian grocery store. Their small size and spots make them perfect for springtime decorating. They were around $3.00 for 18 eggs, which makes them quite affordable. You could tuck a few into a wee nest, or nestle several among moss in a pot of Easter flowers, or perhaps add them to an Easter table setting for decoration.

Just make sure that people don't think that they're made out of chocolate!
Friday, April 6, 2012
Washi Eggs
Sunday, April 1, 2012
Scilla
Sunday, April 24, 2011
Bunny Buns


A centerpiece for Easter dinner can be made from a wire Easter egg stand... with the additions of moss to each wire cup, some small candles, spring flowers tucked into dampened florist's oasis, and tiny eggs.
Also adding enjoyment to the table were these delightful bunny buns. The name alone brings a smile. What fun!
Friday, April 22, 2011
Easter Pastels
Sunday, April 4, 2010
Sunday, April 12, 2009
Minor Adjustments

I made a few adjustments today to the display I arranged on our mantle yesterday. I switched the vase I had put the daffodils in to a small jug in the most scrumptious colour. The jug was a happy thrift shop find. I had bought some polka dot candles in the shape of eggs in the same shade as this jug as well as some in spring green a few weeks ago and was just waiting for a way to use them. I added the candle eggs to the bowls and presto, an improved display, not as "au natural" as it was but more colourful and fun.
Saturday, April 11, 2009
Easter Display

I wanted to create a nature-themed Easter display this year. The starting point was a couple of pieces of tree bark that I keep for various purposes throughout the year, some moss and some wee speckled eggs from Loblaws. I would have liked everything I used to be totally natural, but since I don’t have access to real speckled eggs, I had to settle for these stand-ins. I brought out some bowls I have in natural colours and gathered together a bunch of daffodils, pussy willows and a nest made from dried vines. Taking care to vary the heights, I gradually filled the mantle with my selections, moving things around until everything seemed to look right together.
Friday, April 10, 2009
Earless Bunnies

Since the boys were young I have created an Easter “tree” with home-grown pussy willow branches and Easter-themed ornaments each year. The ornaments were tiny painted plaster bunnies, eggs, wee carrots and all things spring. Over the years more and more of the bunnies have become earless. Oops, I guess they were dropped on the floor too many times! The wooden painted eggs have fared better. I thought about changing the decorations this year to pretty pastel ribbon bows or hand-coloured eggs but I’m not sure I want to deviate from tradition just yet.
Thursday, April 9, 2009
Easter Cookies

Easter is coming quickly... and what would Easter be without cookies? Rather than find the answer to that question I will have to start baking. Last year I baked two shapes: Easter eggs and Easter bunnies. The bunnies were made with a vintage cookie cutter I found at a church bazaar. As I started to decorate the cookies, I was inspired to use royal icing in a new way. To begin, I laid down the usual smooth icing base but then, rather than piping on the extra details, I suddenly thought why not paint them using a small paint brush and watered down food colouring? This was the result. Not bad for my first attempt. I will learn how to improve on this technique the more I use it. It certainly increases the possibilities. Using a brush one can render ideas in much greater detail than what you might achieve with only a piping bag and tips.


